iPlace SDK
iPlace has a SDK that allows the integration of any IP device.
To perform a simple integration it will be necessary to follow the steps detailed below. The type of integration described will allow, on the one hand, to receive the changes related to the inputs of the device, and on the other, to act on the outputs of it.
Create a descriptor file of the device to integrate.
To begin, it will be necessary to create a descriptor file of the hardware device to be integrated. This file, with extension .conf, must present a structure similar to the one shown in the following table.
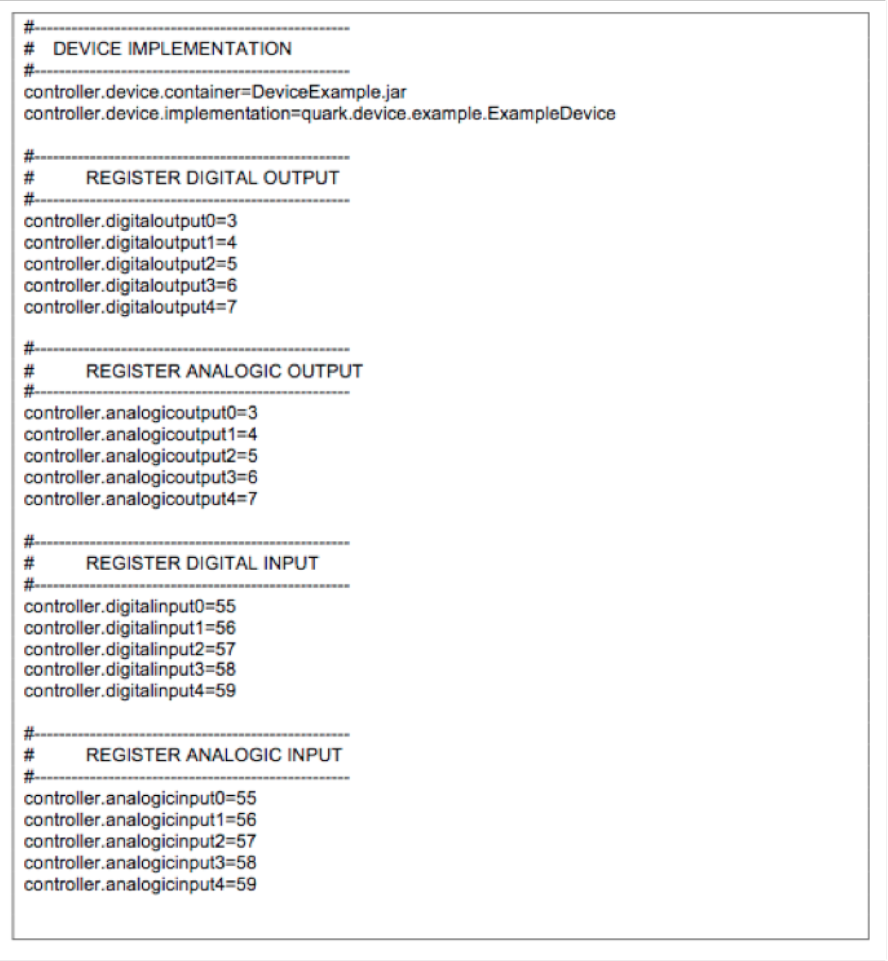
On the other hand, the controller.digitaloutputX properties will identify the registers that are going to work as digital outputs. The number associated with that label is the identifier with which will work later on the device in order to refer to that record. That is, all actions sent to the device will be done with this identifier. The number of elements will depend on the number of digital outputs that the physical device has. The same happens with the controller.analogicoutputX property on the analog outputs.
As for the entries identified by the controller.digitalinputX and controller.analogicinputX properties, these identifiers will be associated with the IP device inputs. Therefore they will be used to reference the updates received. In this way, any update from the device must be accompanied by this identifier so the system knows what type of input is and to what record value change belongs.
Create a new project.
To start developing the implementation that will allow the integration of the IP device, it is necessary to create a new JAVA project. To do this, IDEs such as Netbeans or Eclipse can be used. Once the project is created, it is necessary to add the QuarkSDK.jar and log4j-1.X.XX.jar libraries, which will allow to have the necessary methods to develop our own Device. For this it will be necessary create a class that extends from CustomDevice. In the following image you can see a class example (ExampleDevice).
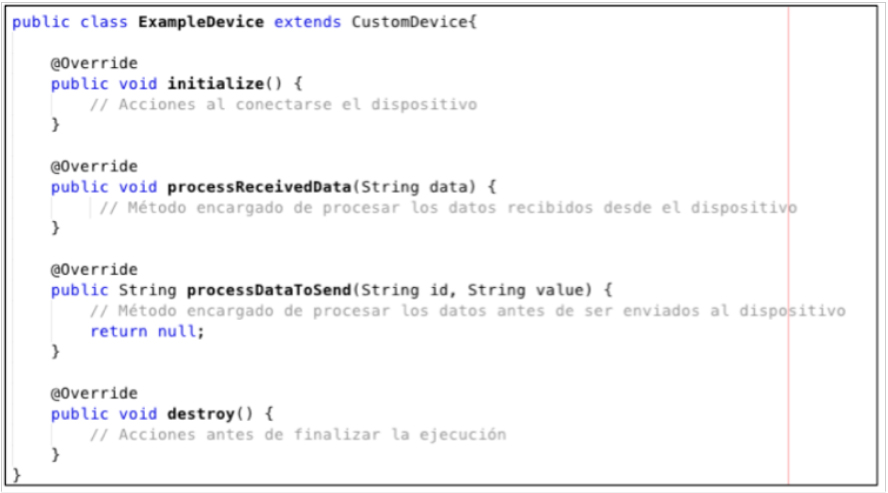
- initialize(): Once the IP device establishes connection with the platform, the exchange of information begins. It is at this time when the initialize () method is executed. This method can be useful for sending information of interest for the device. For example you can send the set of from which you want to receive information, in this way you can optimize the data exchange, obviating the rest of the elements of the device.
- processReceivedData(String data): every time the IP device sends data, this method is in charge of receiving that information and processing it as suits the method. For example, in the case of the change of a given entry, this method will be responsible for analyzing the data received in search of the updated record and the new value received.
- processDataToSend(String id, String value): When an action is sent to the device, this method is responsible for constructing the request. As parameters, it receives the identifier of the register and the new value. Therefore, this method is responsible for making the package that will be sent to the device.
- destroy(): before the system stops, iPlace performs a controlled stop of the monitoring for each device. Therefore this method can be used to carry out certain tasks such as closing auxiliary connections or releasing other types of structures.
SDK methods.
| Methods | Description |
| List getDigitalOutputs() | list the digital inputs of the device |
| List getDigitalInputs() | list the digital inputs of the device |
| List getAnalogicOutputs() | list the analog outputs of the device |
| List getAnalogicInputs() | list the analog outputs of the device |
| String getPreviousValue(String element) | returns the current value of the element |
| boolean isNewValue(String element,String value) | returns if the value is different from the previous |
| boolean containsInput(String element): | returns if the item is loaded as input |
| boolean containsOutput(String element): | returns if the item is loaded as output |
| boolean updateInputValue(String element, String value) | Send the item update to iPlace |
| boolean sendAction(String element, String value) | Send the change action to the device |
Add the developed device to iPlace
Once the implementation of our Device has been developed and tested, in order to have this device in the iPlace platform it will be necessary to follow the steps detailed below:
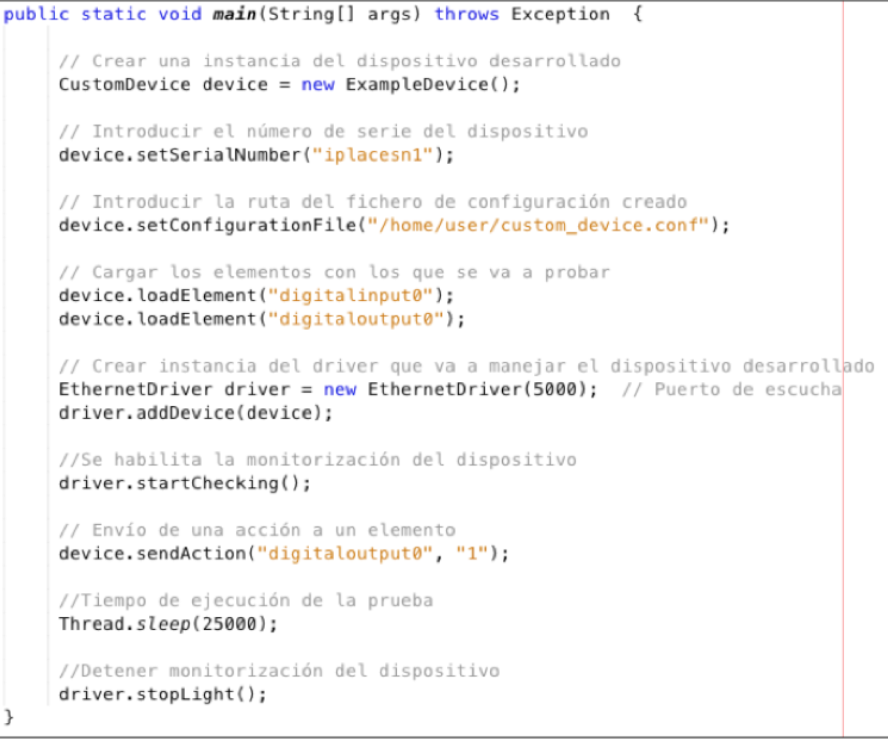
- Have a developer license. The enabled demo for new devices integration has a developer license. This license offers the possibility of working with 5 devices. The test serial numbers match iplacesn1, iplacesn2, iplacesn3, iplacesn4 and iplacesn5.Therefore, to test our device, we will use one of those five fictitious serial numbers. If you need a specific serial number, you need to request a personalized license.
- Add the implementation: Once the developed project has been compiled, the resulting .jar should be included in the folders where iPlace has its executables. Specifically, the .jar should be located in the iplace/core/extension route.
- Add data to the system. In order for iPlace to know the related data to the new device, it will be necessary to add a new controller in charge of monitoring the implemented Device. To carry out this task the iPlace configuration interface is used, specifically it will be necessary to access the Home Automation tab.Clicking on Add will show the following form to create a driver.
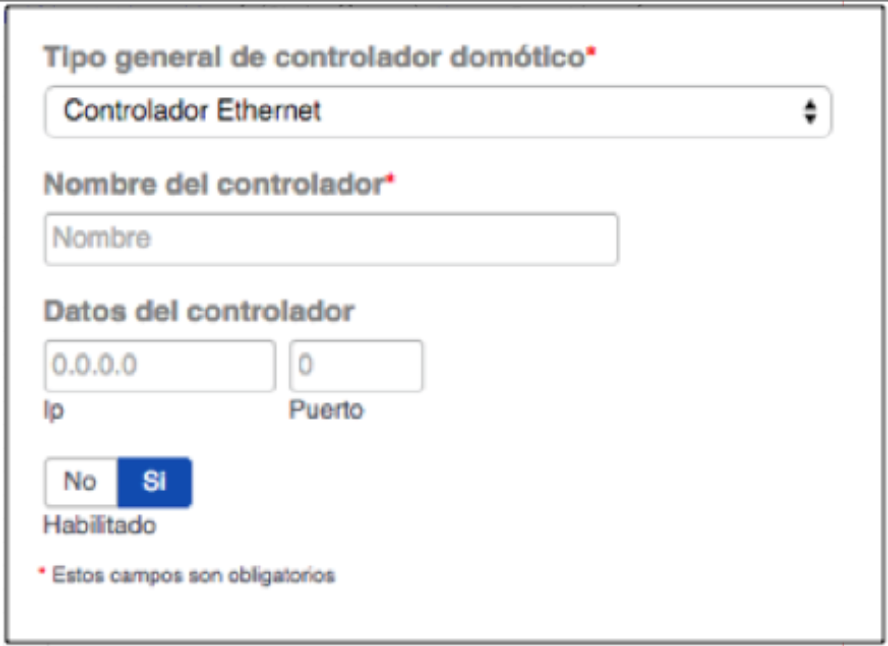
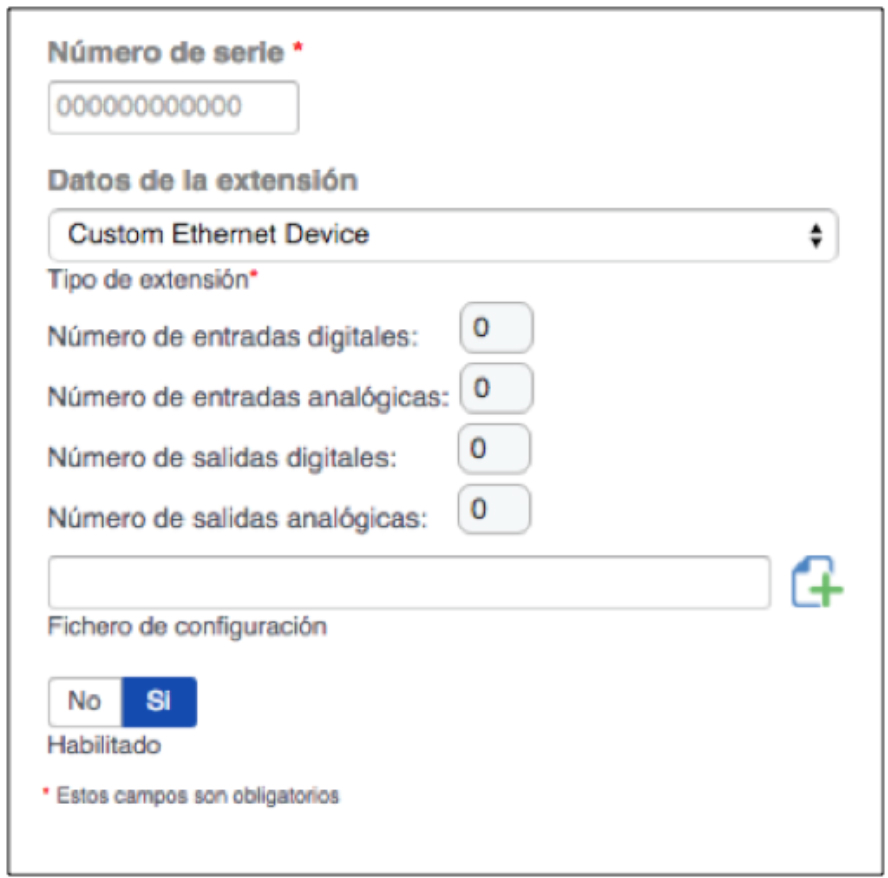
Information